
Hi there, It's Dilan 🤓!
In this second episode of the blog series, after what we saw on the previous episode we can now continue with the deployment of a single server.
Terraform uses a delcarative language(meaning you just describe what you want, and he will figure out how to make you wish come true.), to defines configuration files.
Now let's get into the netty gready of Terraform, generally the first step when writing a .tf configuration is to configure the provider(s) you want to use.
To follow what we are doing, create a main.tf file and put the following code :
provider "aws" {
  region = "ca-central-1"
}
This simple snippet tells Terraform that you want to use AWS as provider and deploy your infrastructure into the ca-central-1 region.
The general structure to create a resource in Terraform is :
resource "<PROVIDER>_<TYPE>" "<NAME>" {
  [CONFIG ...]
}
Where
PROVIDERis the name of a providerTYPEis the type of resource to create in that providerNAMEis like an alias, you will be able to use throughout the whole config file to refer to the resource.CONFIGconsists of one or more arguments specific to the resource.
Here is an example code that deploy a virtual server in AWS(an EC2 instance):
resource "aws_instance" "example" {
  ami = "ami-0453ec754f44f9a4a"
  instance_type =  "t2.micro"
}
The code can get more complicated than that but for now we just need those 2 required arguments:
-
ami : Here you should put the
AMI IDfound under the EC2 details page for the instance you created. -
instance type : Here we define the type of instance we want based on the amount of resources we need (like CPU, RAm, Disk Space, etc).
After we have that code snippet, we can save it as main.tf and inside the directory we store it , run the following :
terraform initNote : it’s safe to run init multiple times (the command is idempotent).
The command will tell terraform to read the file and initialise all the necessary codes, like download the corresponding API codes from your provider (AWS in our case).
Te next command which is terraform plan help us see what terraform will do before we validate it.
terraform plan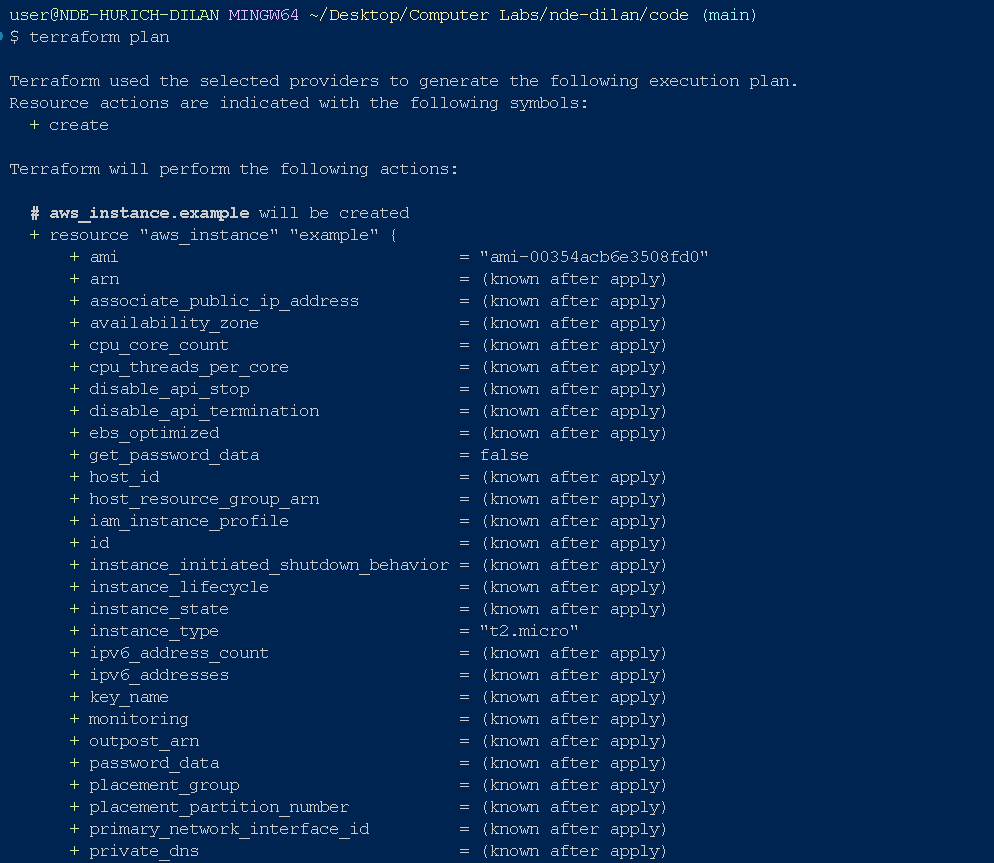
Terraform will provide a little summary with some stats de 2024.Outlining what will be added, remove and/or change.
Once you are satisfied with your different changes/configurations, you will can run the terraform apply commad and let terraform do its magic!!
The terraform apply command will show the same output as the terraform plan command and you will be prompted to accept or reject an action.Terraform is just asking if you are sure to continue with creating the different resources you declared inside the file:
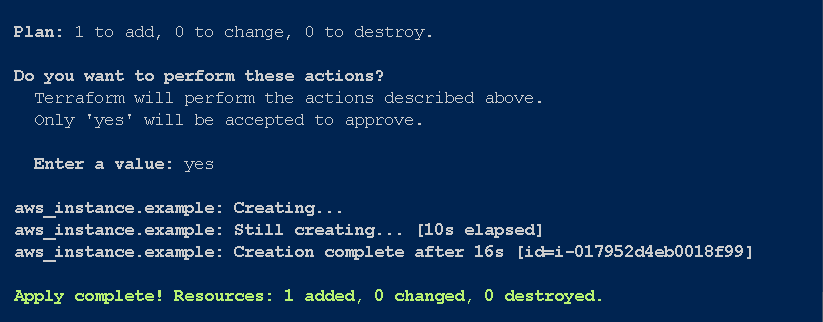
Congrats, you’ve just deployed an EC2 Instance in your AWS account using Terraform! You can verify this by going to your EC2 dashboard in your AWS account!
Alt...! It's not yet the end!
You can see that the EC has been created but without a name :

To add one, the only thing you need to do is to add a new ling of code right after the instance_type :
tags = {
  Name = "Learning-Terraform"
}
After making this change the only thing you need to do now is run the
terraform applyand typeyesin the prompt!
Another thing we should note is that
Terraformjust refresh the state and thus doesn't recreate everything from scratch , it knows what has changes and just update on the EC2 instance (that's one of the advantages of declarative approches: you just specify what you want, and Terraform determines the most efficient way to make it happen.).
After deploying or creating our EC2 instance , it's time for us to deploy something there.
Here's the architecture we will be following to deploy a simple web server responding to https requests:
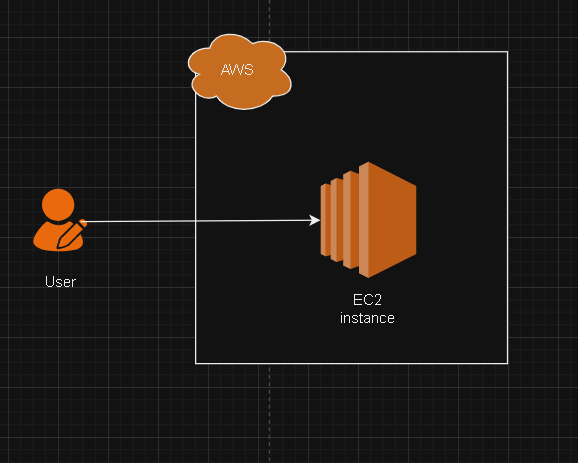
Now when talking of web server there are many choice here with all the web frameworks that we have nowadays, but to keep thing simple we are going to use a simple bash script with the tool Busybox(which is available on most linux system by default) to create a simple web server returning the text 'Hello World!' as response.
#!/bin/bash
echo "Hello World!" > index.html
nohup busybox httpd -f -p 8080 &
Now that we have the code, the question is how to get our EC2 instance execute it when it's starting?
That's where we need the user_data argument , we just set it inside the resource declaration scope like in the following :
resource "aws_instance" "app" {
ami = "ami-0453ec754f44f9a4a"
instance_type = "t2.micro"
// <<* EOF EOF>> is a way to use multi lign string without inserting \n
user_data = <<-EOF
#!/bin/bash
echo "Hello World!" > index.html
nohup busybox httpd -f -p 8080 &
EOF
// Set to true so that when you change the user_data parameter and run apply, Terraform will terminate the original instance and launch a totally new one.
user_data_replace_on_change = true
tags = {
Name = "Learning-Terraform"
}
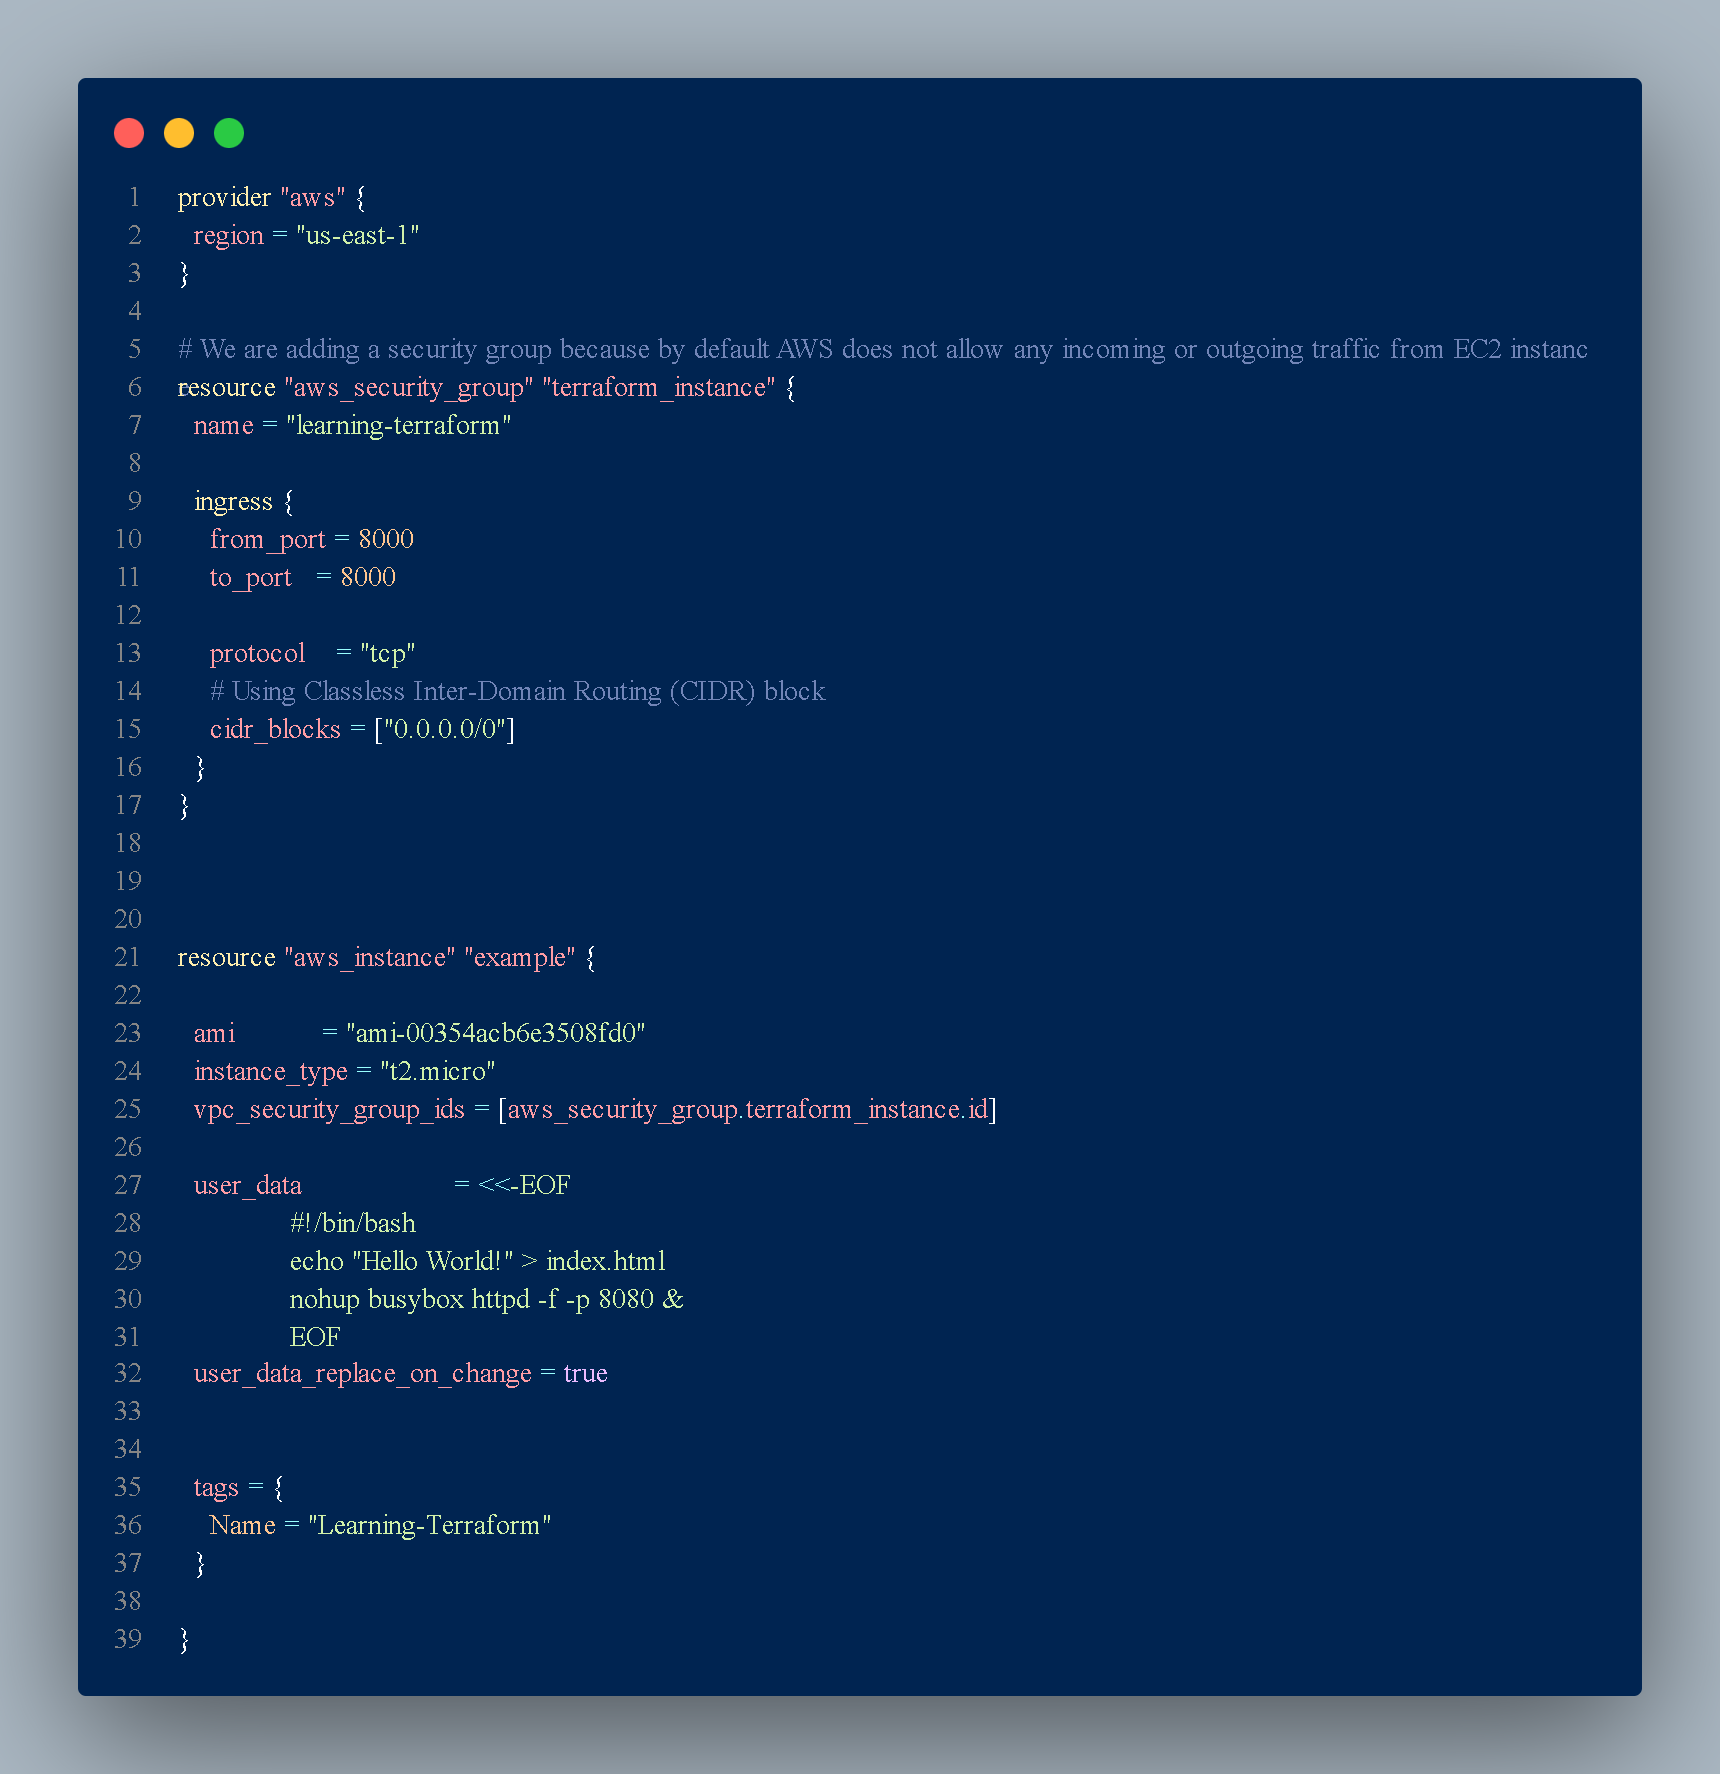
}Here's the complete code :
Notice how all resources for the AWS Provider begin with aws_
Now just run this from any terminal:
 $ curl http://<EC2_INSTANCE_PUBLIC_IP>:8080
 Hello, World
It was Dilan, GDGoC ( Google Developer Groups On Campus) Lead. See you soon! 👋